
3D product renders for ecommerce work best as an image system, not a folder of unrelated beauty shots. A product detail page needs clear evidence. A marketplace needs a legible, accurate main image plus useful alternates. An ad may need a wider composition, a vertical frame or room for copy. Those outputs can share an approved 3D product scene, but they should not be forced through one camera and one crop.
Plan the set by image role, product state and destination frame. Keep geometry, finish mapping and graphics fixed as product truth. Let cameras, lighting, context, background and negative space change where the commercial job changes. The result is reuse with control: fewer decisions are repeated, while each image still earns its place.
This guide presents an original buyer-side planning framework. It stops before platform-by-platform acceptance, catalog ingestion, DAM design and change-management operations. For the broader rendering process, inputs and deliverables, start with 3D Product Rendering: Process, Inputs and Deliverables.
Build the image system from shopper questions
A shot list should begin with what somebody needs to learn, not with familiar camera names. "Front three-quarter" describes a view. It does not explain why the view exists.
Write the buying questions first:
- What exactly is included?
- What shape, footprint and proportion should I expect?
- Which material or construction detail justifies closer inspection?
- How large is it relative to a familiar setting or measured space?
- How does a moving or removable part change state?
- Which finish or configuration am I choosing?
- What image can carry the campaign idea without obscuring the product?
Then assign one or more image roles to each question. Some products need every role below; a simple object may need four. A complex appliance may need several detail and function views. The framework is intentionally product-led rather than channel-led at this stage. One useful form view might support both a PDP gallery and a marketplace alternate, while the campaign image may need its own composition.
Scope still changes with camera count, environments, finishes and derivatives. The separate guide to 3D product rendering cost drivers and example scopes owns that budget discussion. If the unresolved question is whether CGI or photography is the right source method, use the balanced CGI versus product photography decision guide before building the shot board.
Use a commerce shot taxonomy
The taxonomy below is an original DE-013 planning tool, not a platform standard. It prevents ten attractive images from answering the same question while a necessary product fact remains unseen.
| Shot role | Shopper question | Useful visual treatment | Likely reuse |
|---|---|---|---|
| Identity | What product am I buying, and what is included? | Complete product, restrained camera, clean silhouette, accurate included parts | PDP lead, marketplace main candidate, catalog tile |
| Form | What does it look like around the object? | Front, rear, side or elevated views with stable scale and camera logic | PDP gallery, marketplace alternates, comparison layouts |
| Detail | What should I inspect closely? | Purposeful close-up of a material junction, control, fastening, texture or label | PDP gallery, feature module, sales enablement |
| Scale and context | How large is it, and where does it sit? | Measured context, familiar surrounding objects or a room cue that cannot be confused with included items | PDP explanation, contextual alternate, campaign support |
| Function | What changes, opens, connects or moves? | Paired states, exploded relationship or a short still sequence with one clear action | PDP explanation, feature ad, launch story |
| Variant | Which color, finish or valid configuration am I viewing? | Locked camera and lighting where comparison matters; explicit product-state ID | Swatches, variant galleries, comparison modules |
| Campaign | What should I notice or feel first? | Art-directed light, context and copy space while the product remains legible | Paid media, launch banner, email and social creative |
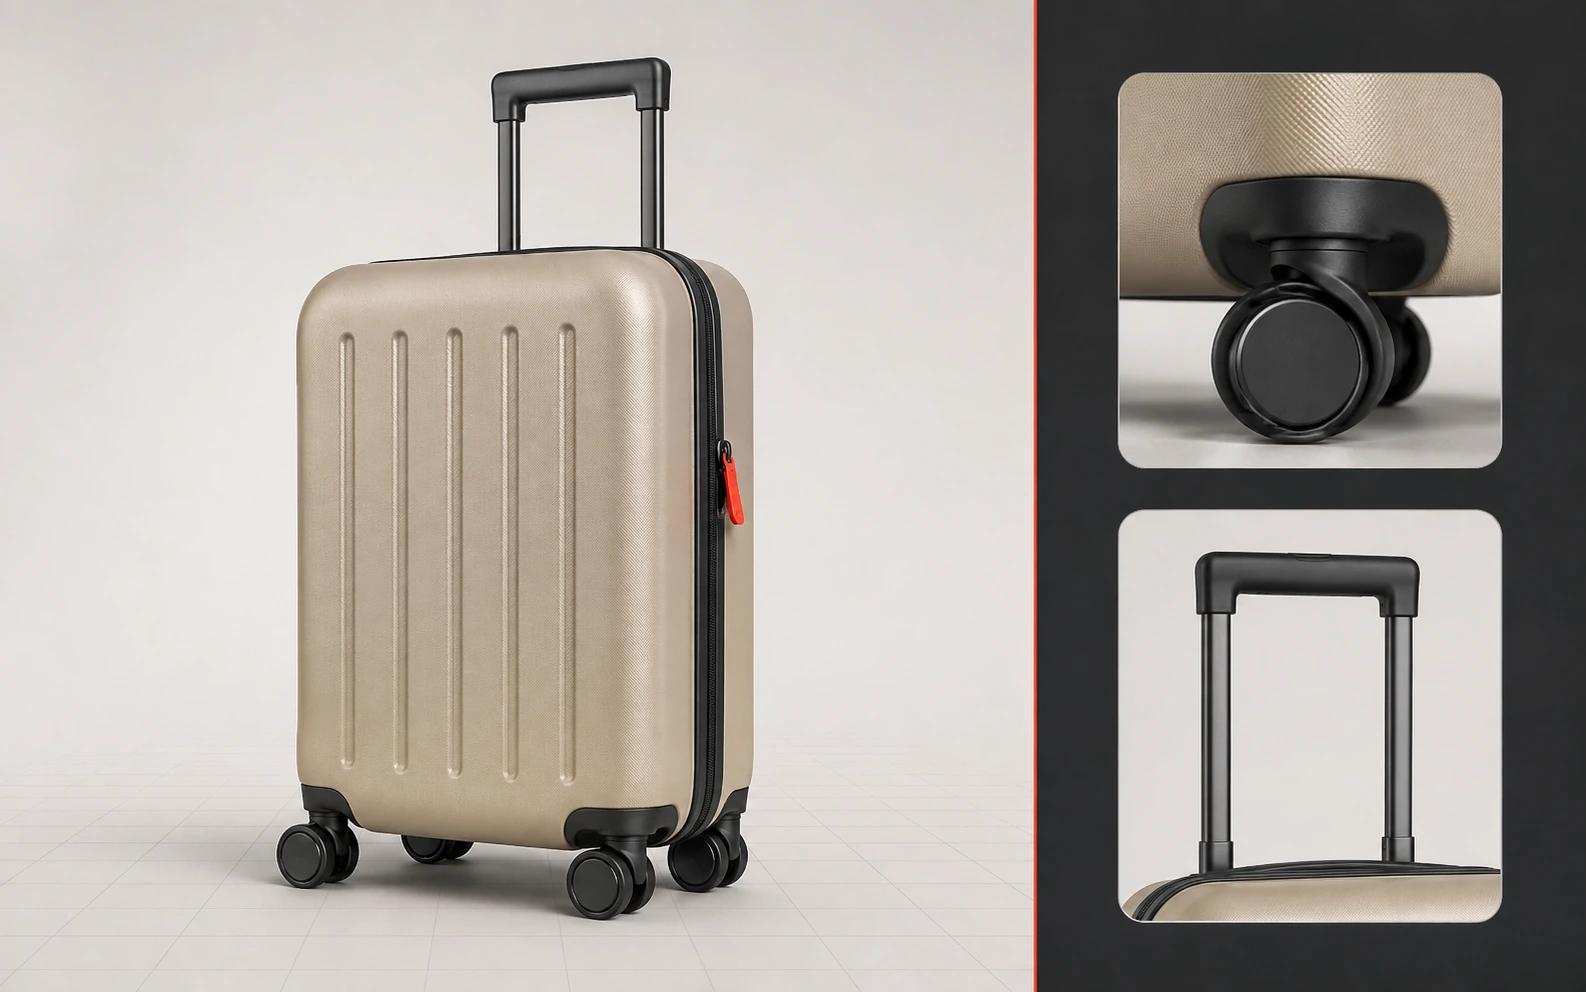
Turn each selected role into a line in the shot board. A compact identifier can carry the essentials without becoming an operations manual: product state | shot role | camera family | background family | ratio family. Keep the plain-language purpose beside it. If two rows have the same purpose, decide whether they are genuinely different views or duplicates.
The identity shot deserves special care because it becomes a source for small thumbnails. Test the silhouette at the smallest expected display size. Fine texture can disappear; included accessories can read as clutter; a low-contrast edge can merge into the background. Solve those problems in composition and lighting before relying on sharpening or an oversized export.
Detail shots should also have a reason. A close crop of a logo is rarely as useful as a crop that explains a control, join, finish transition or functional clearance. The caption or adjacent copy can carry the explanation; the image should make the evidence visible.
Keep product truth fixed and presentation flexible
Reuse depends on knowing what may change. Treat the approved model revision, dimensions, assembly, finish assignment, artwork and included parts as the locked layer. Treat camera, light, background, context and crop as presentation branches.
| Layer | Keep governed | Allow by image role |
|---|---|---|
| Product definition | Silhouette, dimensions, part relationships and included components | Visibility of hidden parts only when the view or state calls for them |
| Surface identity | Finish names, material zones, texture direction, graphics and variant mapping | Lighting that reveals a finish without changing its identity |
| Product state | Door, handle, attachment, fill level or other approved state | A function shot may show a second valid state, clearly identified |
| Presentation | Nothing is universally fixed here | Camera, background, contact, props, atmosphere, copy space and ratio |
This separation matters when the wide ad wants dramatic side light but the neutral listing image needs even readability. Both can be honest. Problems start when presentation silently changes the product: a seam disappears, a finish becomes glossier than the approved sample, an accessory appears without being included, or a camera makes one variant look like a different size.
A variant family should share enough camera and lighting logic for comparison. It does not require every campaign image to be mechanically identical. Lock the comparison views; art-direct the persuasion views. Record which is which.

Separate neutral listing truth from persuasive imagery
Do not ask one image to be both a listing identity image and a complete campaign. Google Merchant Center separates one main image from additional imagery, then allows staged, in-use and detail views among those additional images.[1][2] Amazon's U.S. Seller Central guide likewise assigns its main image to both search and product-detail identity.[3]
Those examples establish an upstream planning principle, not a destination checklist: create a neutral identity branch and a persuasive branch. The neutral branch protects recognition, included-product clarity and small-thumbnail legibility. The persuasive branch can add context, feature emphasis or campaign atmosphere where the destination permits it.
Before export, take the approved branch through the marketplace-ready image checklist. That guide owns current platform file, background, crop, size and dated acceptance checks. A reusable master is an input to that review, not proof that a marketplace will accept it.
Keep claims, prices, badges and promotional copy out of the reusable render master. Add them in a governed layout file for the named campaign. Copy changes faster than product geometry, and baked-in messaging makes a clean product image harder to reuse.
Use an aspect-ratio board before final rendering
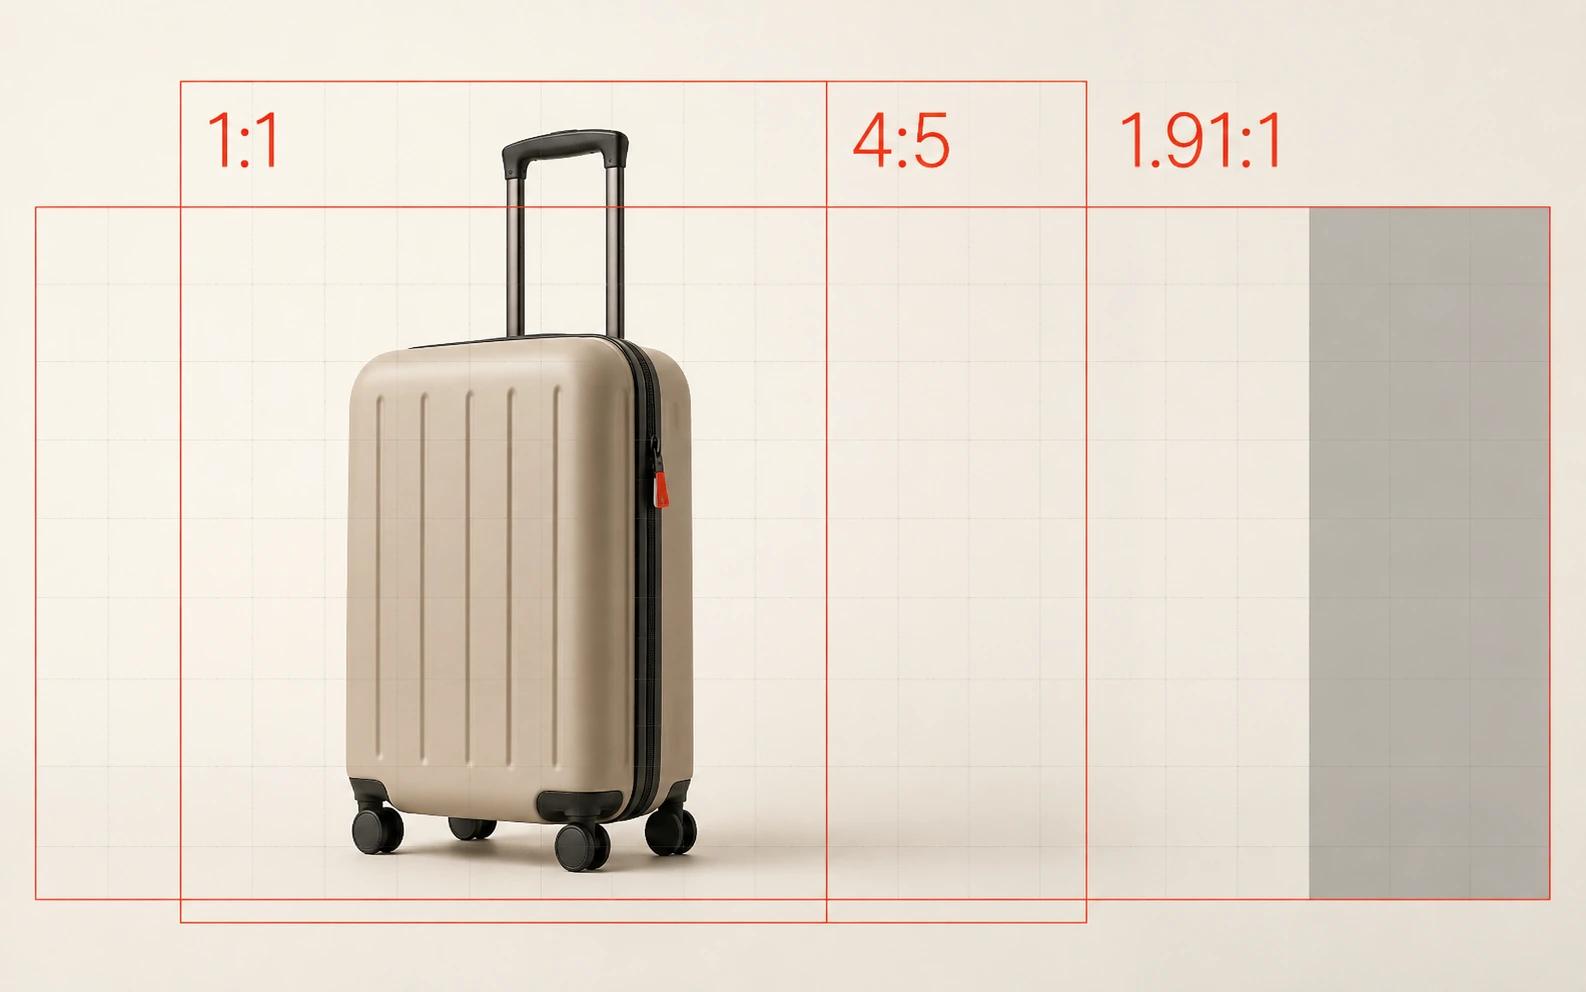
A ratio is not merely an export setting. It changes the composition. A suitcase that feels balanced in a square may become tiny in a wide banner; a handle that survives a 4:5 frame may be cut off in 16:9; copy space on the left can vanish when an automated crop centers the product.
Build a ratio board with the product silhouette, protected edges, intended copy zone and likely crop path. The rows below are planning families, not guaranteed acceptance specifications.
| Ratio family | Primary planning use | Composition decision | Derivative type |
|---|---|---|---|
| 1:1 square | Identity image, gallery tile, marketplace candidate | Centered complete product with enough margin for thumbnail use | Base camera or conservative crop |
| 4:5 or 3:4 portrait | Tall PDP module or feed creative | Preserve full height and dominant feature; reserve a narrow copy zone only if required | Reframed camera, not a blind center crop |
| 16:9 landscape | PDP banner, editorial module or video-adjacent still | Decide which side carries product and which carries message or context | Wider composition with added scene information |
| 1.91:1 landscape | Responsive display image family | Protect a shallow vertical safe area and keep the product readable without embedded text | Dedicated shallow composition |
| 9:16 vertical | Full-screen campaign candidate when the selected media product calls for it | Use foreground-to-background depth or vertical negative space; do not enlarge a square crop until it clips | Dedicated vertical camera or layout |
| 3:2 detail | Feature crop and editorial explanation | Let one construction or material feature fill the frame while retaining orientation | Purpose-built close camera |
Google's current responsive display-ad specification requires horizontal 1.91:1 and square 1:1 images, with recommended dimensions of 1200 by 628 and 600 by 600 pixels respectively.[4] Use those figures only for that named ad product. A different campaign type may ask for another set.
Shopify's theme guidance draws a useful implementation boundary: resolution switching can use srcset and sizes, while genuinely different mobile and desktop crops can use separate sources in a picture element.[5] Production should mirror that distinction. If only the pixel density changes, export derivatives from one composition. If the crop changes the hierarchy, art-direct another composition.
Render composition masters, then delivery derivatives
A practical still-image system often starts with three composition masters: a neutral identity view, a flexible product cutout or clean studio view, and an art-directed campaign view with controlled negative space. Add detail, function and variant masters only where the shot taxonomy finds a real question.
From each approved composition, make delivery derivatives at the sizes and formats required by the active destinations. Do not confuse a larger file with a new composition. Responsive storefront markup can help the browser select an appropriately sized source for the displayed width.[5] It cannot restore a handle that was cropped out or move a product away from overlaid copy.
Name the relationship in the handoff: parent composition, crop family, product state and destination. That is enough for a buyer to see whether a late request is a new export, a new crop or new art direction. Detailed catalog automation, asset ingestion and DAM operations belong in a separate multi-SKU production guide.
Package meaning with the pixels
Every image needs a product association, role and destination note. Informative PDP images also need text alternatives written for their context. W3C WAI guidance says text alternatives should communicate the information or function represented, and that the author should choose them according to the image's use, content and context.[6]
That means the alt text for an identity render can name the product and visible configuration. A detail render should name the useful detail, not just repeat the product title. A complex comparison or ratio diagram needs its essential information in nearby HTML, which is why this article uses semantic tables instead of trying to embed the full framework in an image.
Record captions only where they clarify what the shopper should notice. Keep legal copy, offer text and rapidly changing claims outside the pixels. Preserve rights and provenance notes for the model, textures, type, stock elements and generated components, even when the public caption does not show them.
Review the set as a system
Reviewing images one at a time hides drift. Put every scoped product state and ratio family on one board, then use four passes:
- Product truth: compare silhouette, parts, finishes, graphics and included items across the set.
- Role coverage: confirm that each selected shopper question has evidence and remove images that merely repeat another view.
- Crop survival: inspect every approved frame at its likely display size, with safe zones and copy areas visible.
- Channel meaning: check that neutral listing images remain neutral, campaign images retain hierarchy, and variant views are genuinely comparable.
This is editorial acceptance of the image system, not a replacement for current platform conformance. A channel owner should still verify the live account, market, category and placement rules before upload. Put those changing checks in a separate acceptance sheet so a policy update does not force the creative taxonomy to be rewritten.
Measure the system without inventing a business case
A reusable system is an operating hypothesis until real use is measured. Record the baseline and the exact change: a new identity image, added detail coverage, a revised crop family or a campaign composition. Then read the metric that belongs to that decision, such as gallery engagement, ad creative results, listing diagnostics or qualified enquiries.
Do not attribute a sales change to rendering alone when price, traffic, offer, stock or page copy also changed. A clean test record is more useful than a universal uplift claim. It can show which image role deserves another iteration and which expensive derivative nobody uses.
Brief the reusable set
Send the current product revision, approved finishes, included parts, selected shot roles, variant states, destination frames and named approvers. Mark which outputs are neutral listing candidates and which are campaign compositions. The project discussion can then begin with a visible image system rather than an undefined request for "all the usual angles."